Leave the blobs behind… and get consistent results every time.
When the cookie jar is on the top shelf, we stand on a chair to get it. When we drop a screw down into the bowels of whatever we are working on we reach for the magnetic pick-up-er-thingy. When we are working with surface mount components ( that make a grain of rice look chubby ), a pair of tweezers and a magnifying glass are essential.
My dad is a fine carpenter – I still marvel at the incredible work he does.
The quality of your work depends on how sharp your tools are, their size, and your skill in using them.
I’d like to share a small tool with you that I use regularly to make a tool… wait… tools making tools is kind of meta. Anyway – the result is a tiny solder ring that is looped around a contact that gives really nice looking and very consistent joints / contacts. As a side benefit, the solder rings typically stay in place, freeing-up the hand that you use to feed solder to your hungry circuits.
You’ll need:
- wire cutters
- hobby knife ( #11 blade )
- tweezers
- your fav solder
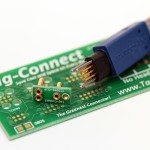
- 2-pin female power connector
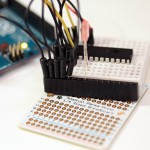
- extra long headers

Let’s get started.

Use your wire cutters to gently remove the longest pin.

With your tweezers, lift the small plastic tab that prevents the wire from coming out of the power connector. Remove the wire and set it aside.

Straighten the pin.

Push your straightened pin into the female wire connector – just at the point that friction holds it in place.

Solder the straightened pin permanently into the female connector. I know… I’m using some helping hands here and didn’t mention it in the supply list. If you don’t have helping hands you can tape the wire to a glass. Be careful not to use too much solder – if you do, the connector won’t go back into the housing.

Insert the goods back into the housing.

Ok… now what?

Grab your favorite solder, and insert the end into the power connector.

Begin winding the solder loosely around the pin – loose is the key. Too tight, and you’re going to have to use the force to get it off.

Keeping going until you approach the end of the pin.

Clip the solder when you reach the end.

If you liked the slap-chop… you’re going to love this!

Kaakow… swoosh – BAM! ( sound effects added for greater affect )

CAREFULLY insert the incredibly sharp #11 blade into the center of the coil.

Press down evenly so you don’t break off the delicate tip.

Take your time, you’ll probably only get 1-2 rings per cut. Rushing, pushing, and forcing isn’t a good idea.

The rings need a little love after they’re cut. Take a flat object ( I’m using the handle of the tweezers ) and press the ring flat.

A flat ring has a better chance of staying where you put it and is easier to pick-up with tweezers.

Grab your circuit and place a ring on the connection.

Place the tip of the soldering iron on the connection and heat for 2-3 seconds… and then drop the tip onto the ring – just long enough for it to melt into place.

See what I mean about consistency?

The same technique works for connections on the top of the board as well.

Same thing – heat the part for 2-3 seconds and then drop the tip onto the ring – just long enough for it to melt into place.

No more solder globs!

Experiment with different size solder to finely tune your application. If you’re using solid-core solder, you may want to keep a flux pen handy – a little dab will be more than enough.

Throw whatever you didn’t use along with your solder-o tool into a baggie for later use. Enjoy!